|
Original of this guide can be found at www.DVD-SECRETS.co.uk
Having a backup of my dvd collection is relatively straight forward these days with various programs available to compress the disc content. But because i own the original - i don't want to be bothered by having to watch trailers that can only be fast forwarded through (increasingly common with Universal DVDs), warnings about copyright in every european language, and the same studio logo repeated throughout the process of trying to get to watch the film!! I'm also not too bothered about including the extra content (after all, it's still on my original) - which means that when it comes to repeat viewing of the film - the original can stay on the shelf (minimising wear and tear/fingerprints etc.) and i can look forward to the best quality possible (as near to the original anyway).
Having used a fantastic little program called MenuEdit for a while (for deleting buttons and replacing studio logos / warnings with blank clips) - a new program is now out, which makes the same process far easier and has plenty of scope for further delving into the structure of a dvd 
DvdReMake, currently at version 1.3 (this guide was done using v1.1), is available from here: www.dimadsoft.com. There is a demo that can be downloaded to try the following out, but you won't be able to export the dvd.
As well as DvdReMake, you'll also need to download DVD Decrypter (freeware) from here: www.dvddecrypter.com
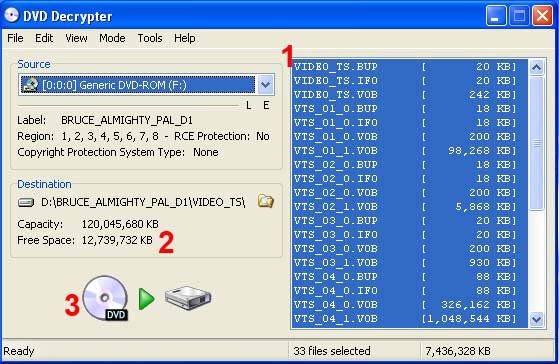
1 - Once you've loaded up dvd decrypter (and DVD is in your DVD-ROM), you'll need to make sure it is in FILE mode (Mode menu, File). Make sure all the files are selected.
2 - Check you have enough hard-disk space. You will need space three times larger than the dvd you are about to decrypt (i have another HD with enough space available, so i am ok for this project). The reason i suggest to have 3 times the size of the DVD available is: Space to decrypt the dvd to, space to export the new stripped dvd to and space to transcode/re-encode (if necessary). I always keep all files for the project on the HD until satisfied with the final result.
3 - Hit the button and wait for the files to be transferred.
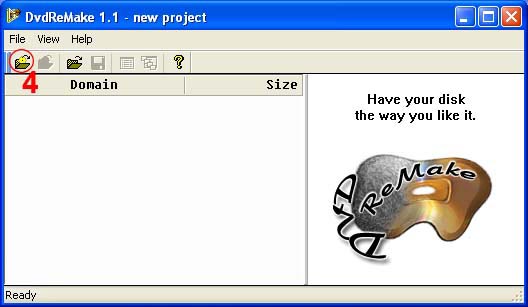
Once the decrypting has finished, load up DvdReMake.
4 - Click on the button highlighted to import the dvd.
It is a very good idea at this point, if you have not already, to watch the dvd on startup to see what clips play and which menus you see - just to get an idea of what to look for in DvdReMake.
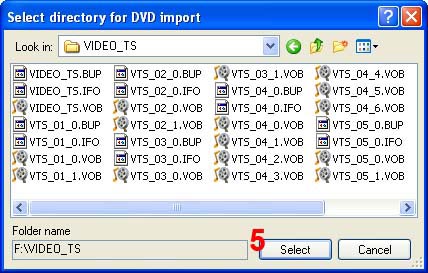
5 - Browse your HD for the folder, then when you see all the dvd files press the select button (you don't need to select the files - you're just selecting the directory).
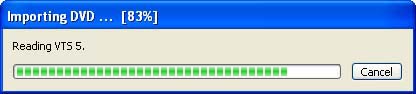
It doesn't take very long for the dvd to be imported - unless (and now i'm paraphrasing the author) 'there is an inconsistency between ifo and vob files and DvdReMake had to parse vob files - which might take some time.'
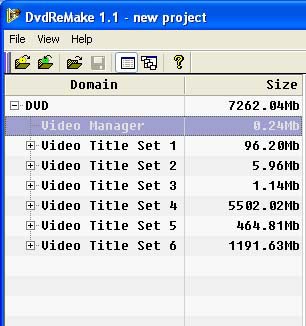
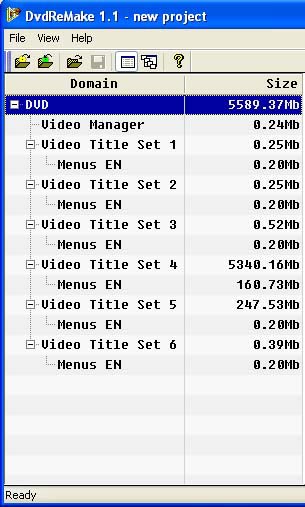
You can now see the total dvd size at the top, and how large each Video Title Set is.
Selecting Video Manager, brings up the above window.
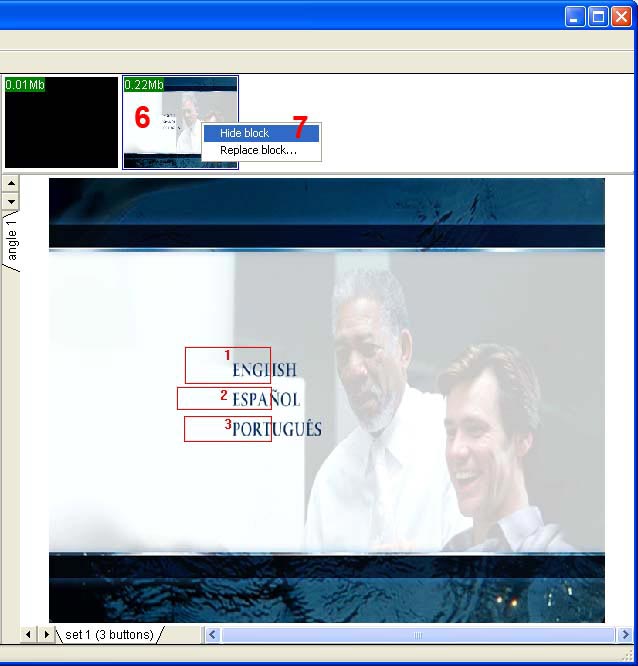
6 - each of these frames contains the filesize of the cell. When selected, their content is displayed in the main window. For this dvd, it is a still menu asking the user to choose their preferred language. Due to the fact that this dvd is an english R2 dvd, i assumed that removing this selection would skip me straight to the english menu (which it does). If it doesn't work with your choice of dvd, then you may have to keep this menu. (I have done the same on similar dvds with no ill effects so far...)
7 - right clicking on the small frame brings up a pop-up menu with two choices. I want to hide this menu (or in other words - replace it with a blank cell).
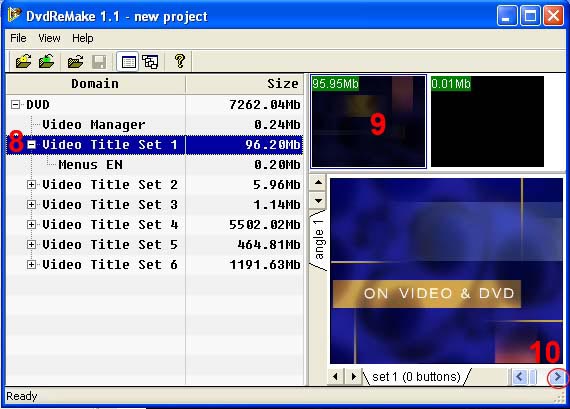
8 - Selecting Video Title Set 1, brings up the above.
9 - There is a clip here which is a trailer for a forthcoming title. I want to be able to go straight to the menu on startup and also don't need this trailer - so it gets hidden through the right-click, hide command.
10 - More often than not, the clips start off black (ie. fading in from black). To see what the clip is, select the frame at the top (9) and then press the right arrow button to scroll through the clip.
The next couple of title sets contain WARNING notices and dvd production logos, which i don't want either - so they get the 'hide' treatment 
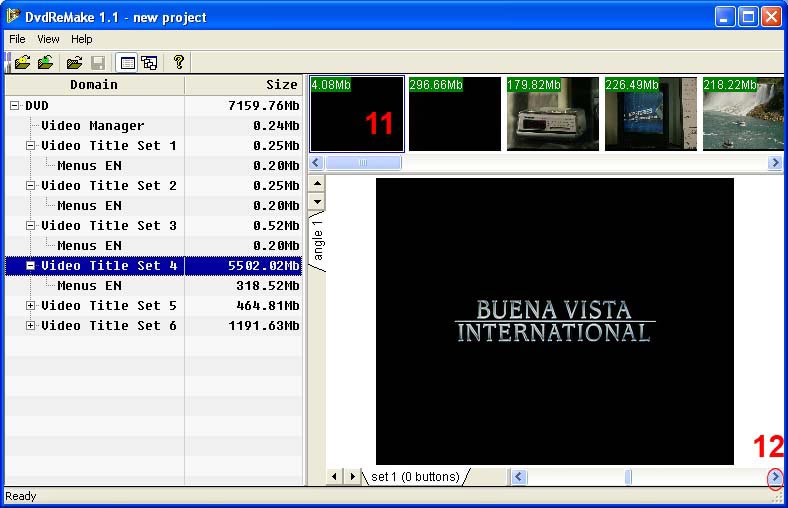
Video Title Set 4 has the largest size and is obviously where the movie is located.
11 - The first frame is only small and may not be part of the movie.
12 - Checking what the clip is, it is the distributor logo which can be removed with the Hide command.
In the top frame, scroll to the end to see what's there - sometimes there can be trailers or dvd production logos hidden at the end. You can also select a frame and cut from that point onwards (ie. to save space, you could cut the credits).
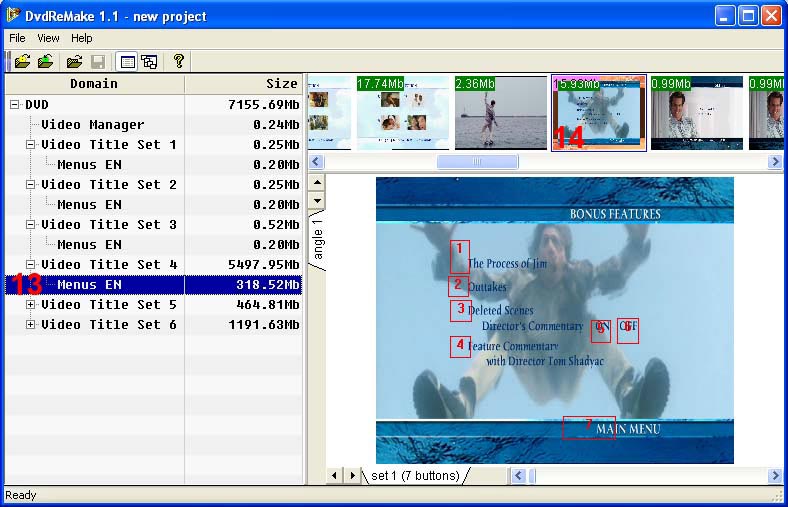
13 - Selecting the Menus section, brings up the various parts of the menu in the top frame.
14 - Browsing the various parts of the menu, i want to modify the bonus features menu.
Selecting the appropriate menu puts it in the main frame. You can see the button hotspots and their numbering. I'm keeping the outtakes, but removing all other extras - so will need to remove or hide any buttons so that they can't be selected. This can be done by right clicking the hotspot and selecting the 'hide button' or 'delete button' option. (The hide button keeps the numbering of the other buttons intact, removing the ability to select them - The delete button removes the buttons and reduces the number count on any other buttons left in use).
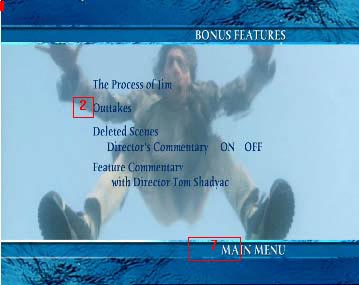
The above is what the menu looks like after removing reference to the other hotspots.
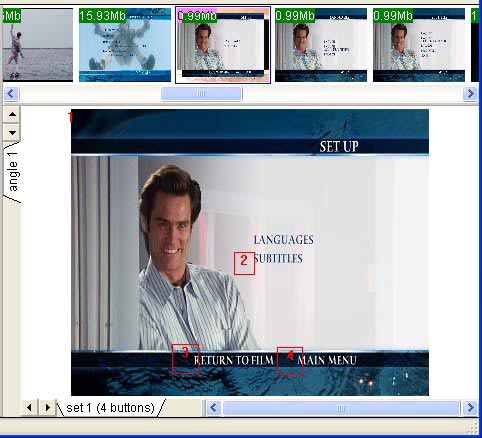
Scrolling along the top frame, i'm planning ahead and going to remove the possibility of selecting different languages (because they are going to be stripped out in the compression stage).
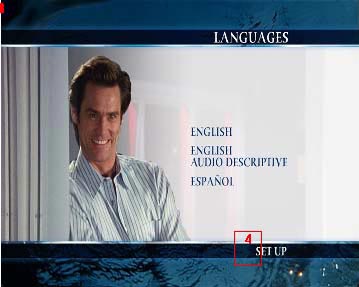
The next frame along shows the languages which i'm also going to remove reference to, just in case the menu can be selected via the dvd remote.
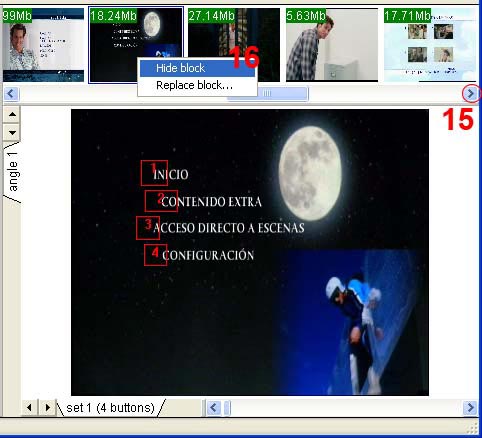
15 - Scrolling along the top frame - there are the same menus but in a different language. I'm not going to need any of these, so the Hide command gets used saving even more space
16 - I'm not going to need any of these, so the Hide command gets used saving even more space
Now you can see how much space has been saved, allowing the final video quality to be higher. Initial size, 7262Mb - new size 5589Mb. A similar comparison using Pinnacle Instant Copy 8 - compressing the full dvd (removing 3 audio streams) uses 60% compression on the main movie. Using Pinnacle IC8 on the modified files uses 87% compression
To finish off, you can save the project for further editing later or you can export the dvd. Exporting to a different directory on a different HD works out faster. The export process only takes about 5 minutes.

|

 Copyright ©2003-2019 DimadSoft. All rights reserved.
Translated by khoaowen2510 [at] yahoo . com
Copyright ©2003-2019 DimadSoft. All rights reserved.
Translated by khoaowen2510 [at] yahoo . com