|
| Users say: |
I can't thank you enough for your help. You guys are really great.
Greg
|
|
More...
|
|
|
After downloading DvdReMake, extract the file from the ZIP archive and run it. Notice - one executable - those guys really know how to write code! No installation or unistallation is needed. You are free to move it on your system.
In the main menu, choose "File" -> "Import DVD"
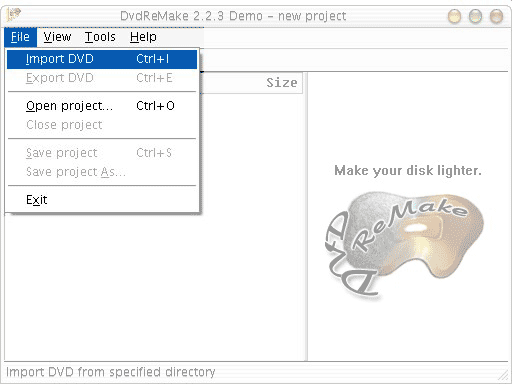
Scroll to the folder where you just decrypted your DVD. Open the first file - this is a file by the name of "VIDEO_TS" (an IFO file).

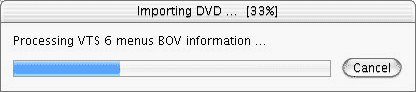
DvdReMake is importing the DVD structure - it should take a few seconds to run
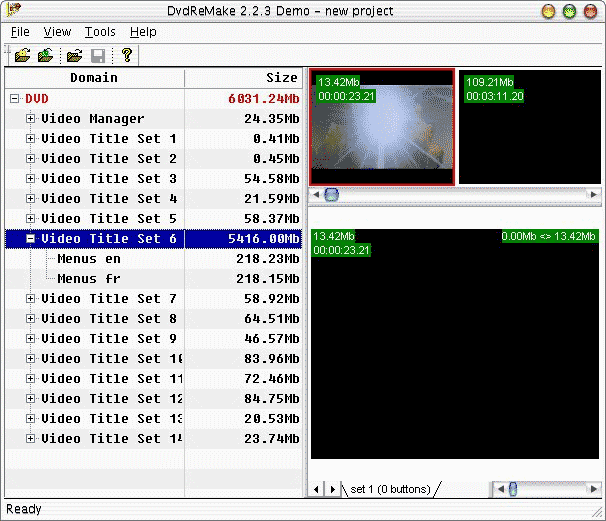
Now let’s translate what we see on the screen:
- First we see the current DVD size which is 6031.2 MB
- After the DVD we see Video Manager. This is the part of your DVD that is in charge of running everything. Think about it as the "Windows OS"
- Then we see lots of Video Title Sets (or VTS). Some big, some small, and one is really, really big. This big one is our main movie and usually the menus that come with it.
So let’s start enjoying the DvdReMake remarkable capabilities. First, double click on the big VTS and open it.
As you can see, I have two menus on my DVD. One is in French and the other is in English. Since I choose English as my menu’s I want to remove the French Menu. Nothing can be more simple then that. Right click on "Menus fr", you will be faced with the following options:
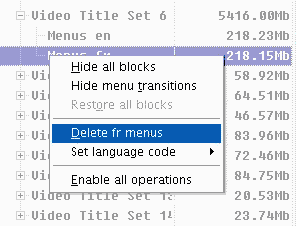
Choose the "Delete fr menus". Wait a second and… they are gone! You can do the same action in every VTS which includes in it more then one language as a menu have, and it will save you a huge amount of space with just one click of a button! In the case of T3, there was one more French menu in the "Video Manager", so I deleted it as I did here.
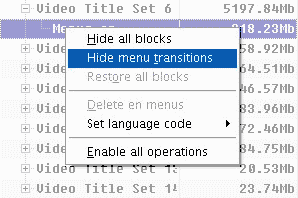
Every time you choose an option in a menu most of the DVD’s do something which is called "Menu Transition". This is the video that runs between two menus. Now some people, like myself, just love to leave the menu transition on, but if you do don’t forget it usually unneeded space. So let’s remove it from our English menu. Right click "Menus en", and choose "Hide Menu transitions":
In this DVD, You gained 40MB of data. On some DVD’s, you save hundreds of mega bytes in menu transitions by disabling them!
Now let’s take care of the other content. I first recommend you NOT to touch anything which is less then 2-3 mega bytes, unless you’re really bored. Usually those are usually things like legal warnings and it might be even illegal to remove them.
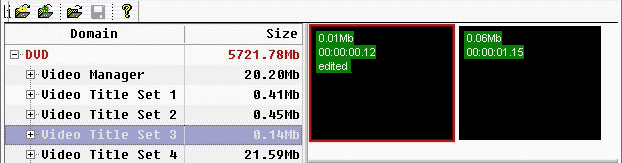
So let’s see what I have: Video Manager - we will delete content from it later, then VTS 1 and VTS 2 which are very small. VTS 3 size is 54.58mb so let’s check it. Click it to open it.
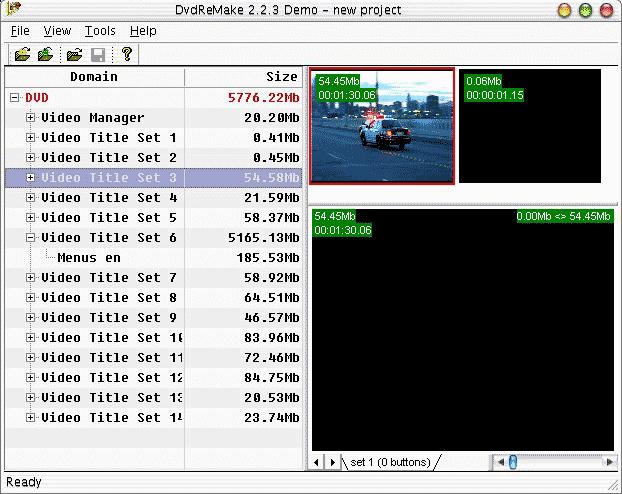
The screen you see is divided into three panes. On your left, the DVD structure. On the upper right pane you see all the blocks in the specific DVD VTS. So we have here two blocks, one in the size of 54.45mb and the other with the size of 0.06mb. Again - don’t bother with the small ones. Let’s look what the 54.45mb chapter is all about.
The lower right pane is the preview pane. On the lower right part of it you will find the scroll bar that allows you to move forward or backward… so let’s use it…
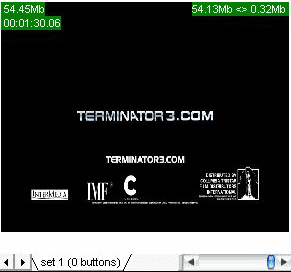
This is a trailer. So we want to remove it - right? Right click on the chapter on the upper right pane, and choose "Hide Block"
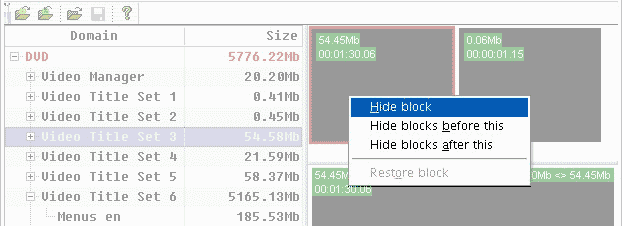
See now, the VTS has turned from 54.58mb into 0.14mb. Not bad for one click!
Now, if you had more chapters in this VTS, I would have recommended you to go and checked every one of them and disabling them one by one. It always gave me safer results then trying to use the "Hide All Blocks" on the VTS menu level.
Repeat the same process on all the other VTS, except the main video VTS. You can go with the same process over the Video Manager. Please be advised that the process of disabling unwanted content can be used for everything, including menus as you will see pretty soon.
Now we have passed the content removal phase, let’s see how much space do we have:

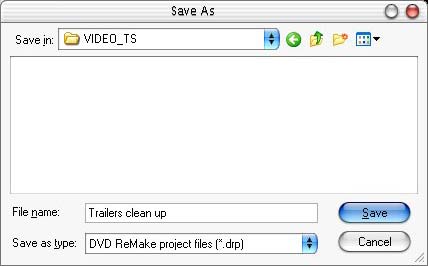
We just finished the first round of clean up. I think it’s time to save. Go to "File" menu and choose "Save Project As". A browser window will open up. I recommend saving the project file in the same directory of the DVD files. Name it the way you want (e.g. "Trailers clean up")
Are we finished? Well, not yet. It’s time to clean up. Relax - I meant clean up the menus - not your room.

|

 Copyright ©2003-2025 DimadSoft. All rights reserved.